Ancient wisdom teaches what life reveals to us time and again. Namely, that for everything there is a season. In worm composting, that truth is revealed in the endless and perfect cycle of reaping and sowing.
Joy of joys! After only a few short months of “sowing” kitchen scraps, shredded paper and yard waste, the time for a harvest celebration is at hand. A harvest refers to any of the ways we collect finished product vermicompost from our red wigglers.
Worm farmers play an important backup role in the flow of nature’s rhythm:
- We provide nutrients to our red wigglers through otherwise wasted resources.
- Our worms transform those waste materials into a new source of valuable nutrients we harvest and call compost.
- We feed that harvested compost to the soil which serves to nourish plants
- The plants then offer forth their bounty.
- The cycle continues!
Reasons to Harvest
There are a handful of good reasons to take that black gold for yourself rather than leave it for your red wigglers. In fact, harvesting is considered a worm farming “best practice”.
Compaction
Over time, the bottom layer of vermicompost may become rather compact under the weight of a growing population of worms, food, water, and bedding. A bin that is hard to lift may testify to hundreds of pounds of recycled waste, but it can also be hard to manage.
Ideally, the compost you use should be light and have a fine texture that is easy to distribute, work with, and dissolve when hydrated. Harvesting is part of the process that will get your vermicompost to that point.
Living Conditions
Not only is compaction an issue, but the concentration of the vermicompost in the bottom layer creates unhealthy living conditions for your worms, according to researchers at Cornell University. We don’t even want to mess with potential dangers, so harvest we shall!
Valued Resource
Don’t forget, this is black gold we’re talking about! According to research, we can expect each pound of worms to yield about 3 1/2 pounds of the good stuff per month!
There is tremendous value in what our composting worms churn out. I’ve seen first hand how plants respond to a compost amendment, so, I’m super pumped to get it out of my bins and trays and into the garden.
Join me, and let’s get to it!
Is it Time Yet?
How can you tell when it’s time to prepare for a harvest?
It takes at least 45-60 days for worms to properly work product into quality vermicompost with a balanced profile. This means as often as every couple months we should be checking to see if the material in our bins is ready for collection.
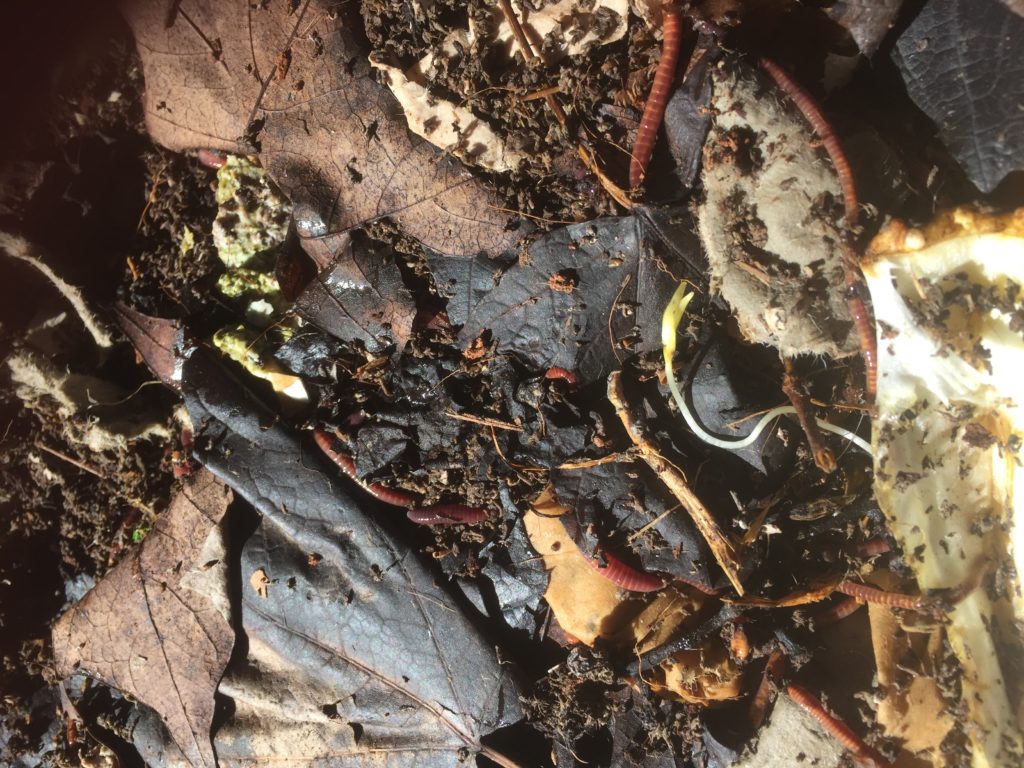
The casts themselves refers only to the material that has gone through the body of the worm and come out again. Know what I mean? Wink, wink, nudge, nudge. Whereas, finished vermicompost is a combination of worm casts plus the organic remains of bedding and food particles left unconsumed.
This rich compost material should smell earthy and be dark in color. For the most part, none of it should be identifiable. One common and acceptable exception to this rule is the bits of eggshell which take much longer to break down.
For many of us, the cold of winter gave our worms nothing but uninterrupted time to eat and reproduce. These months were the perfect amount of time for the red wigglers to process a nice rich load of compost just in time for use in spring plantings.
There’s a ton of wonderful ways to use worm compost, and we’ll discuss those next month, but we can’t do much until we get it out of the bin. But how?
Hurry Up and Slow Down
No doubt about it, instant gratification is a driving force for many of us. You know who you are; you see it, you like, it you gotta have it now. Unfortunately, the worm farmer has little choice but to practice patience before reaping the fullness of his/her rewards.
So, relax a while. Take your time and follow these 3 simple steps to wrap up the composting phase so you can be ready when the actual harvest begins.
Trust me, the wait will be worth the weight… in black gold!
Stop Feeding Worms
Give your worms up to 2 weeks without any additional food so that they are forced to process through the remains of the organic material they have left over.
Allow Bedding to Dry Out
Stop adding water to bedding and gently aerate the vermicompost by turning it every so often. The length of time it takes to dry will depend entirely upon environmental conditions and the state of the compost in your system. Just keep an eye on it. If it just falls apart when squeezed together- you are ready.
If you are using a tray system like the Worm Factory 360, just remove the tray you are harvesting from the stack to dry a bit and then proceed with the rest of the steps.
Inoculate New Bedding
Use a couple cups of finished vermicompost (VC) to get some new bedding started. Simply mix the VC into new bedding, moisten, and let it sit. If worms have come along, feel free to add a bit of food.
The microbes in the completed VC will multiply and begin to populate the freshly shredded paper bedding. Once the worms join the party and are fed, plenty of microbes will be ready to breakdown the organic matter and build a new system.
The Harvest Begins
Worm farmers are nothing if not clever and creative. A quick online search reveals plenty have posted effective ways to separate mature worms, babies, and cocoons from their finished product.
Unfortunately, many of those methods require painstaking and laborious efforts to yield the fruits of their labor. Once again, for everything there is a season, right?
I’m good with that.
There are times when picking through a heap of vermicompost for worms can be soothing and relaxingly mind numbing, but when there are thousands upon thousands of worms in a system and only so many hours in a day… well, you get the picture.
Maybe that’s my tell – I must prefer something a bit closer to instant gratification. So, the method I’m about to share lets the worms do the bulk of the work, just as they have been doing all along!
A Simple Two Step Harvest
Step 1. The Light Assisted Harvest
As I mentioned before, our red wigglers will do the majority of this work on their own.
No, they aren’t going to be saddled with the responsibility of gathering compost, rather- they’re going to evacuate the compost so that we have only to scoop up what’s left behind.
How simple is that?!
What do I Need?
If you are working with a Worm Factory 360 or similar product with a ¼ inch grid bottom, you need nothing other than your new bedding in a catch basin of some sort.
If you are working from another type of bin you will need to scoop your vermicompost onto a ¼ mesh screen or similarly spaced colander/sifter of some sort. Consider using a garden grade sifting tool if you don’t want to use items otherwise used in your home kitchen.
How do I do it?
- Place your finished tray or screen of choice over the new bedding in a catch basin baited with something tasty. Remember, your worms have had little in the way of food for weeks. A sweet piece of melon or slurry of veggie puree should be irresistible to the hungry worms on the run.
- Expose this setup to intense, but not hot, natural or artificial light. The worms will naturally avoid the bright conditions and escape into the darkness below. The screen will provide safe passage and the bedding below will provide a soft landing where food and friends will be waiting.
- Every few minutes you can gently roll the VC to expose any lingering worms and encourage their migration. Brush worm-free compost over onto a clean flexible cutting board or even an opened up cereal box- dump that into a bucket or empty tray until you are ready for the next step.
Step 2. Screen or Sieve Harvest
Now that your worms have relocated into a new home and are safe and sound, you can further improve the quality of the vermicompost you’ve gathered. For retail, fertilization, or amending soil- a refined product is much more attractive, bioavailable to plants, evenly spread, and easy to pick cocoons or stray worms out from.
Why Screen After the Light Assisted Harvest:
- Requires no additional materials
- Removes foreign objects (eg. plastic, stickers, plant tags, stones, etc.)
- Results in a consistent texture
- Separates out unfinished material
- Reduces particle size from coarse to fine
- Offers a physical connection to the process
How to Screen
Work over a large storage bin, a wheelbarrow, or even a tarp. You won’t want to lose a bit of that beautiful black gold!
Once again, load up the ¼ wire mesh screen, colander, or Worm Factory tray. About a third of the way full will be enough so that you aren’t losing any over the sides or impeding the freedom of movement.
Begin to gently shake it side to side or tap it as if you’re sifting flour. The castings and composted material will fall through leaving larger particles behind. Dump the larger clumps back in with your worms to be reprocessed a second time. Continue this screening process until you’ve gone through all of it.
Take a close look. Niiiiice, right?! Carefully pick out any worm cocoons or baby worms you wish to send back to their family and call it a day!
Ensure a Great Harvest
Hint: Wet compost clumps up, holds worms, and gets stuck in the ¼ inch holes. Don’t skip the drying process! Otherwise known as curing, the drying process will lighten the compost both in color and in heft making it altogether easier to work with.
Hint: Breaking up clods of compost while still in the bin will expose more moisture and organic material for the worms to process during that food withholding period.
Hint: Use a ⅛ inch screen to further filter your haul of compost. This should catch any cocoons or baby worms you want to rescue.
Job Well Done
Nearing the finish line is really exciting. It can signal the reward for a season of long hard work, or even the start of something new to come.
After months of nurturing a brood of composting worms, a time of celebration follows when at last you see with clarity what together you have accomplished. This is a fun and a special way to experience a hands on part in the cycle of life.
Congratulations on a successful season of sowing and reaping a harvest of black gold worm compost! Find out more by signing up now to receive The Squirm Firm’s newsletter. Once a month our free newsletter will come directly to your inbox alerting you to a new tip, trick, or trusted source of inspiration that will ensure your success in worm composting. Sign up today!
Thanks for the information…And good timing; I am starting to harvest my worms’ winter work to add to my container garden. Can’t wait to see how much better everything grows this year with the addition of vermicompost!
Thanks for your comment, Didi. How much were you able to harvest this time around? Your container garden should be able to feed off of the black gold for months! You can even try adding your vermicompost to a seed starting mix for much higher germination rates and stronger root systems. Let us know how the addition of worm compost works out for you!
I have several questions but not sure you are continuing to answer them.Before i ask them ,are you still active and answering questions?Thanks.
We sure are! Happy to help!
Just beginning with vermicomposting and wondering – what happens if I don’t separate the worm cocoons? Will the baby worms die in my garden soil, or should I just be saving them to keep the colony healthy?
Hi Jo! So excited to hear of your new worm composting venture! If you don’t separate the worm cocoons they will simply hatch wherever they are when the conditions are right. If that happens to be in the garden, those baby worms will survive until conditions are no longer suitable due to temperature, moisture, chemicals, or otherwise. If you are able to pick them out and keep them with the rest of your colony, then they’ll get to reproduce and work your food into compost. In the garden they also would be working to break things down and enrich the soil, but it’s not as likely that they would survive a full lifetime- 5 years ish. In the bin, their value and return seems to offer more. It sometimes comes down to effort. I generally pick out the ones I can easily see, but just send the rest into the garden hoping and praying they have a happy productive life there. ( :
Hi, I have a hot compost heap/pile that is curing in a bin. About 200 gallons. Can I add earth worms during this phase or would that screw up the curing.
Hello James. So, when you say curing, do you mean just doing its decomposition thing? Assuming so, you can totally add earthworms at this point. They will need to keep themselves out of the center of it where it’s too hot, but they should naturally move to where the conditions are suitable. Earthworms will only enhance and speed up the process of finishing your hot compost pile. Now, earthworms are different from compost worms- which tolerate a smaller range in temperatures and remain in the surface layer rather than throughout a big pile like earthworms are more likely to do. Either way, it seems like you’ve got a golden compost situation!
Hello Francesca,
I’ve just harvested my first tray today and got about 10 l (2 gallons);bucket full of compost. It’s sifted through 1/8” sieve (what a pain, I think it was too wet but I had to, as my second tray underneath become super wet and compressed) and I picked up I think most of the cocoons and small worms. I only have about a dozen houseplants at the moment and planning to sow a few seeds for my mini patio garden. What ratio should I use to mix the casting with my other growing medium ( I have peat free seed compost and coco coir). Also, do you recon I will end up with worms in my plant pots this way?
Thanks for your answers
Hi Agnes,
First thing you need to do is test the soil. You’ll want to get a pH reading of the plant you want to fertilize and the vermicompost you will use with it. With this information, you will be able to customize your vermicompost with each plant.
You can find a more detailed explanation here:
https://thesquirmfirm.com/how-to-customize-worm-compost-for-your-garden/
Thanks for your knowledge! I set up up in about 6 months ago. I suddenly seem to have fewer worms. I have put them through a lot. First temps have been 90+ for months and have just cooled down to around 85. I was also away for 2 weeks during which time they weren’t fed. But there seem to be fewer now than when I got home a week ago. I’m not sure if I should harvest and start them over anew, or to see what happens with the cooler temps and regular feeding. I still can’t tell if I’m feeding enough. I’ve been feeding them Frozen cubes of mixed foods that were put through the food processor. So it’s difficult to tell when it’s gone. I’m going to switch to larger foods. But I’m not sure if I should harvest them. Would love your advice.
Hi Margaret!
If you are seeing fewer worms, it is possible that they are just under the surface. But considering the temperature, it might also be possible that some of them have died.
It’s really important to monitor the temperature in the worm bin. If you don’t have one yet, you may want to get a Worm Compost Thermometer to help you make sure that your worms are safe.
You may also want to check out our blog post here to know more about maintaining the temperature in your worm bin:
https://thesquirmfirm.com/how-to-check-maintain-your-worm-bins-temperature/
Red wiggler compost worms require very little in the way of daily maintenance. A properly prepared worm bin should be able to work independently for a couple of weeks before needing any attention. If you will need to go away again, you will want to take a few readings of your bin. Check the temperature, moisture, and pH to know exactly what needs attention before you leave your worms.
You’ll know that your vermicompost is ready for harvest when the material is dark and has an earthy odor. You won’t really be able to identify any specific items in the vermicompost, and it will resemble rich soil.
Hi there. I saw that 1/8 inch hardware cloth kept baby worms and cocoons from falling through but my worm cocoons and baby worms go through the 1/8 inch hardware cloth… Why was I was told that the eighth inch hardware cloth would keep any cocoons and worms from going in the vermicompost??? Am I missing something??? LOL
Hi Lori,
In general, a hardware cloth with 1/8-inch openings is recommended when we need to separate the worms from the worm bin. If this is not working out for you, you may want to consider using two layers of the said hardware cloth and making sure that the openings do not align. That way, the worms may be prevented from getting through.