As spring’s welcome thaw undoes the
the soil underfoot begins to heave.
This is the cue that lets us know,
signs of new life soon will show.
And though most gardeners prepare in advance,
it’s never too late to start seeds for plants.
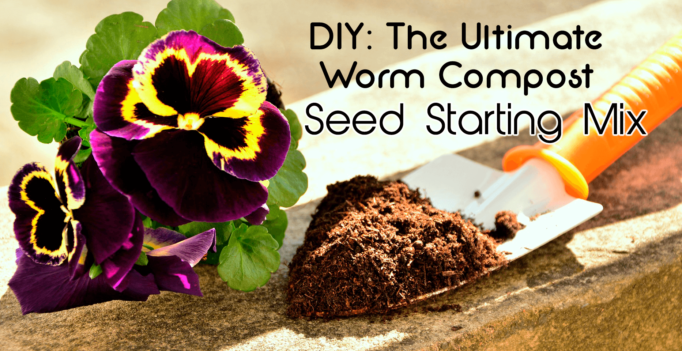
That’s right! This month, we’re going well beyond reducing household waste with vermicomposting. We’re takin’ that black gold and putting it to work right where it works best- in the soil, among the roots, releasing nutrients, sending up shoots.
Use this article to grow your worm compost seed-starting-mix expertise. Step-by-step instructions make it a breeze! Learn how to combine the ideal balance of quality ingredients for all your seed starting needs.
DIY recipes, tools, and worms too, we’ve got it all, (but the seeds are on you).
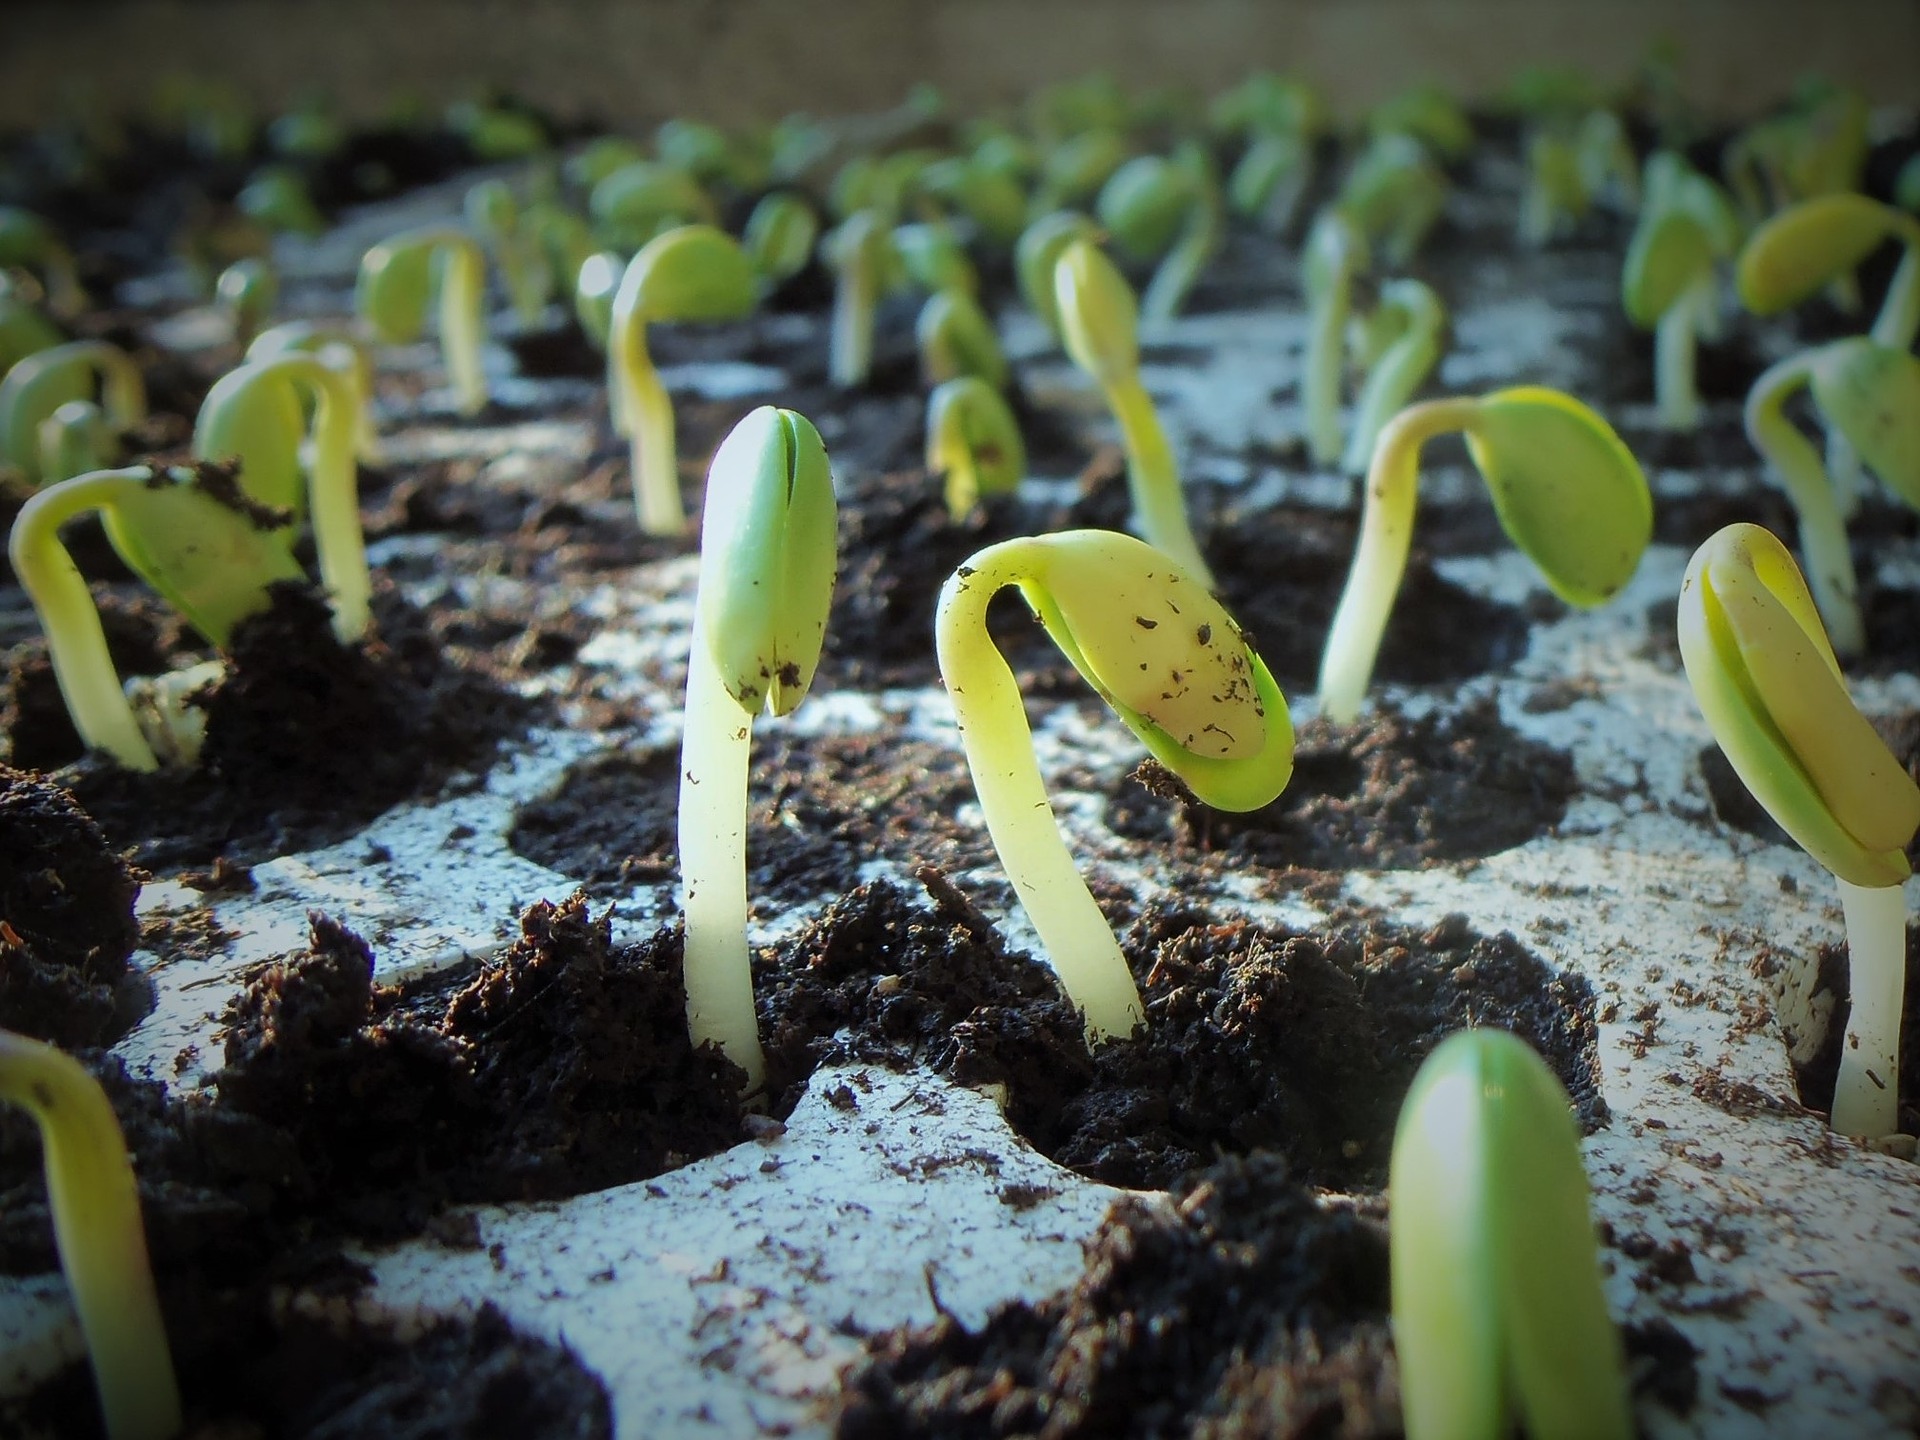
What is Seed Starting Mix?
Quite simply, a seed starting mix includes any combination of materials having the general characteristics needed to grow a seed into an established seedling. The ideal blend provides these four essentials: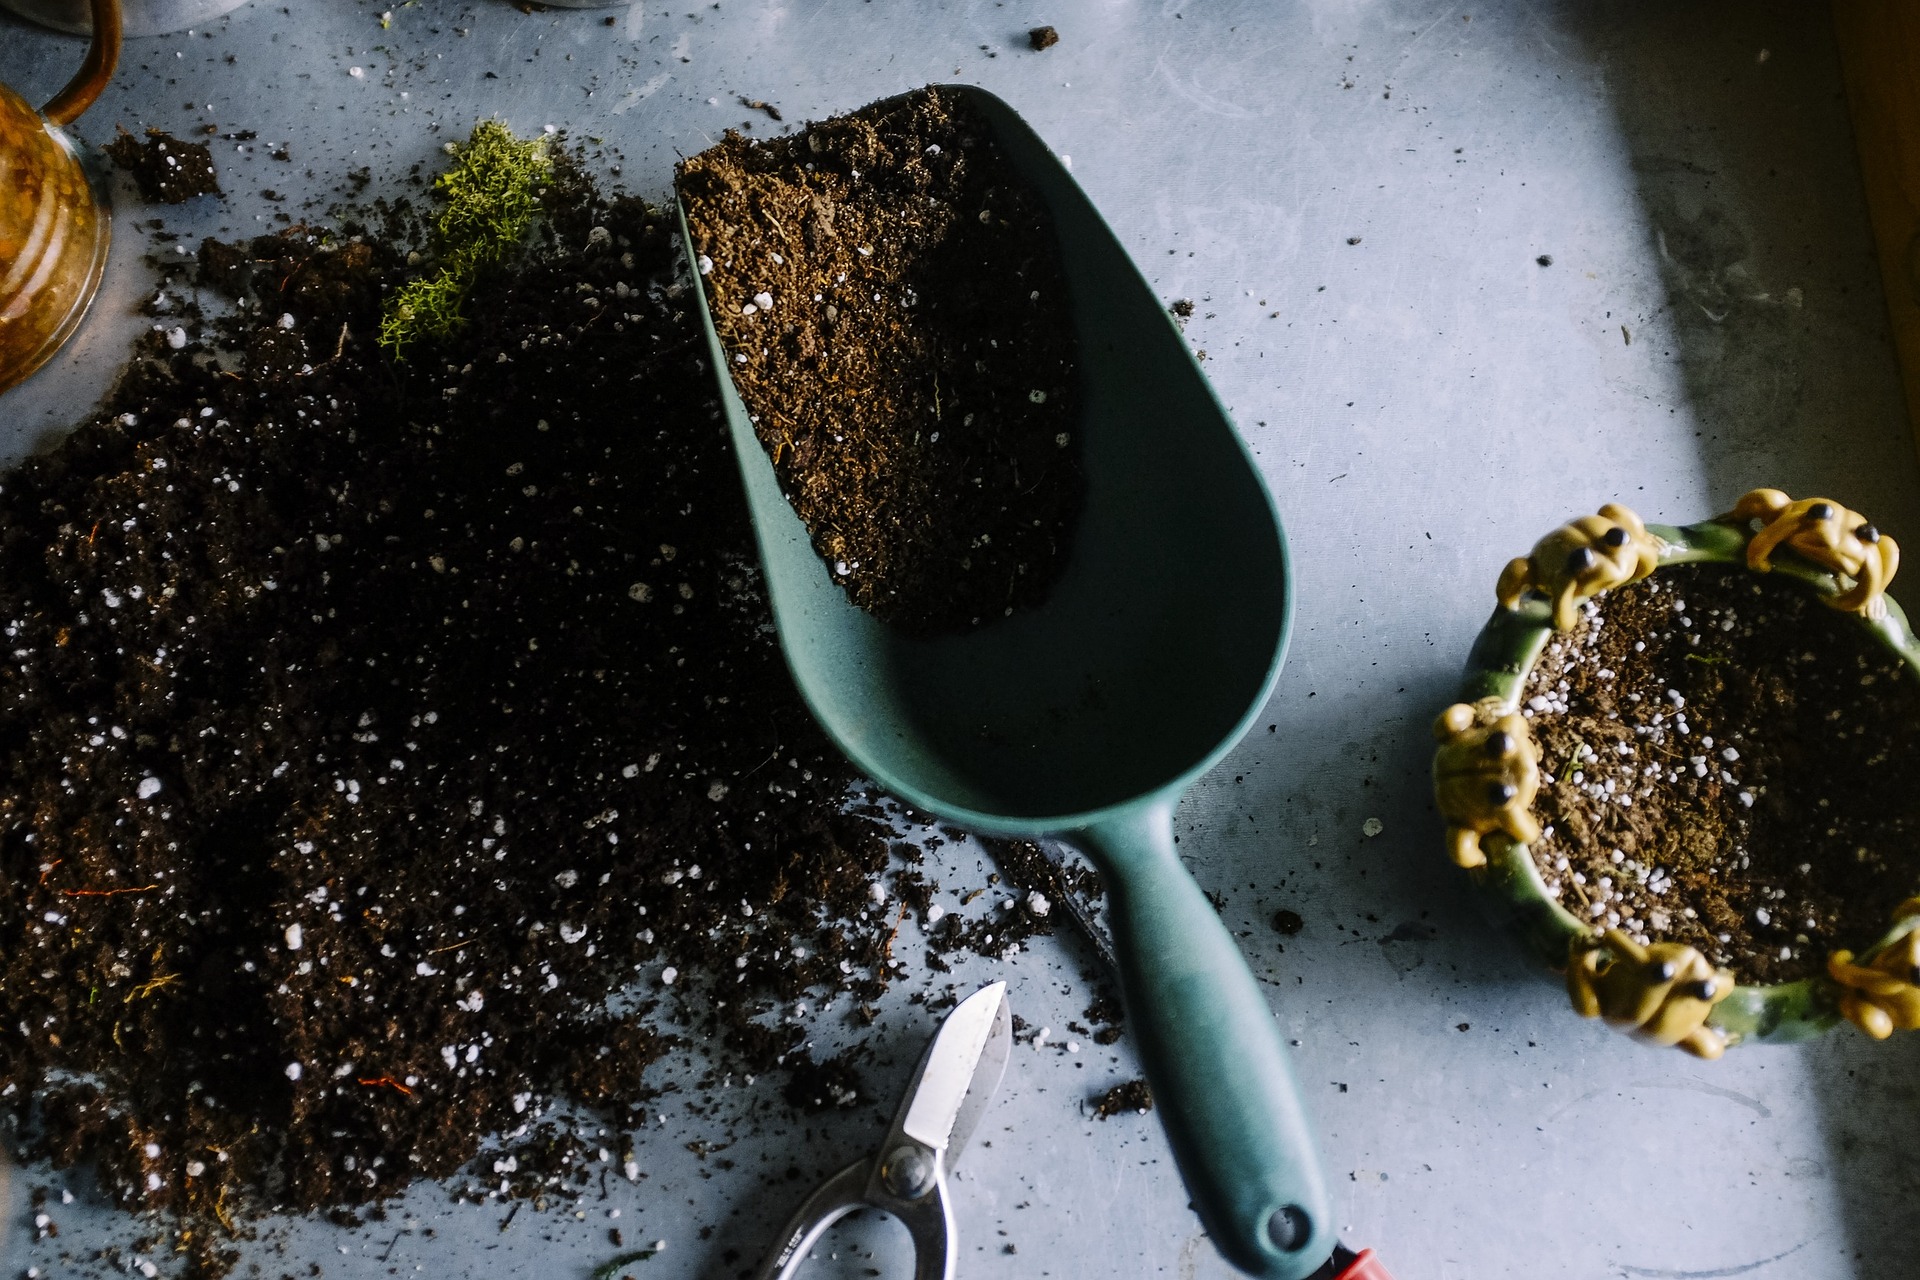
- Drainage
- Moisture retention
- Aeration
- Nutrients
Why Use Seed Starting Mix?
Hold the phone! You mean I can’t use garden soil, top soil, or potting mix for my seeds?
Sorry, Charlie. That’s right; seed starting mix has important characteristics those others just don’t.
For example, I live in the midwest where the garden soil is heavy with clay. That just won’t do for seedlings that require plenty of drainage. What is garden soil like where you live?
While topsoil is an option that may seem better, it still misses the mark. Often full of stones, potentially nutrient deficient, and either too acidic or alkaline, this kind of dirt isn’t reliable enough for growing fussy seedlings.
Can you plant seeds in regular potting soil?
Potting soil comes the closest with its fine texture, but it’s often full of harsh chemical fertilizers that burn tender roots and wee plants. Furthermore, potting soil tends to become compact with watering, squeezing out the little air pockets that provide drainage and oxygen to young root systems.
What’s the solution?
Set your seeds up for success and prepare yourself for a bountiful harvest this season.
There are two ways you can do that.
The first way is to purchase a premade mixture to start your seeds. These cost between one and two dollars per quart, or around $15 a bag.
The second option is a lot more rewarding!
- Use your valuable black gold vermicompost.
- Save money with long-term use.
- Support seedlings with the highest quality ingredients.
- Customize the contents to suit the needs of the different plants you’d like to grow.
Put together a worm compost seed starting mix of your own! The ideal combination will work wonders, protecting plants from diseases, nourishing emerging sprouts, and maintaining both ideal moisture and oxygen levels.
Our recommended blend of special ingredients will give your young seedlings all they need to thrive from day one.
DIY Seed Starting Mix
First things first. You’ll need to gather the ingredients that offer those 4 essential characteristics of the perfect mix.
- For proper drainage and aeration choose from among these materials:
 Perlite, a very lightweight material made of “popped” volcanic glass. It is hard, white, and very porous.
Pumice, yet another light and porous volcanic rock. It is darker in color than perlite.
Vermiculite, an expanded mineral that looks like mica. It both holds water and allows it to drain freely.
Sand, completely neutral and nutrient-free
- For water retention try options such as these:
Peat moss, acidic, nonnutritive, and harvested from a non-renewable resource. Not recommended.
Coco coir, an ideal peat moss alternative sourced from coconuts. It is pH neutral, has potassium and macro-nutrients. It comes in pressed blocks you moisten to break apart.
Leaf mold, pine bark humus, or composted wood fiber, to provide structure and retain moisture. It is water permeable, supports life, and provides stability within the soil.
- For adding nutrients to your DIY seed starting mix, there are many options to choose from. The key to quality, however, is in using the most impressive ingredient available. One that offers the perfect blend of garden superpowers, it’s vermicompost.
An Ingredient with Superpowers
Vermicompost is another word for worm compost, a nutrient-dense and natural plant food made of worm casts (poop) and decomposing organic matter.
On its own, vermicompost has excellent nutrient value, moisture retention, aeration, and drainage capabilities. When combined with other high-quality materials, worm compost delivers the absolute best support system for growing anything from seed. /p>
In particular, it’s the unique chemistry of this natural fertilizer that allows such an incredibly long lasting, slow release of perfectly balanced minerals and nutrients. What’s more, research out of Cornell University found that seeds treated with worm compost are resistant to a fatal condition known as damping off.
Where to find it?
 You could purchase your worm compost from your local garden center, but I highly recommend making it on your own!
It is super easy and quickly transforms your kitchen scraps, yard waste, and junk mail into something life-sustaining and valuable!
All it takes to make your own worm compost is a pound of compost worms and a storage bin, or an all-in-one system like the Worm Factory 360.
Two Simple Recipes
These basic recipes are perfect for growing nearly every type of seed. Try whichever one suits you best and see how well your seeds take off!
* Kept moist and in a sealed container these mixes can last indefinitely.
Beginner
Combine 3 equal parts:
- Sifted worm compost
- Drainage and aeration material
- Coco coir or other moisture retaining material
Advanced
Combine:
- 55% of a mixture of coco coir, leaf mold, and composted wood fiber.
- 20% sifted worm compost
- 15% sand
- 10% bark humus
Should I sterilize my seed starting mix?
Sterilization is done by heating the ingredients to a temperature at which all microorganisms die. However, microorganisms are a highly useful and beneficial part of worm compost, so we allow them to flourish and would not sterilize this type of seed starting mix.
Conclusion
Now you have all you need to assemble the very best seed starting mix for your seeds! Stay tuned to learn how to go beyond using vermicompost for starting seeds, and on to using worm compost right inside the garden!
If you just can’t wait for more exciting guides from The Squirm Firm, sign up for our free newsletter. Once a month, we’ll send you the latest worm composting tips, tricks, and expert advice straight to your inbox.
Happy worm composting!
Thank you for a interesting and informative article, but,(their is nearly always a but)you fell short of excellent,because you failed to to give us ANY information on BARK HUMUS,.Please can you give us all the ideal place/or DIY info on this essential ingredient.If we omit 10% of your recipe we will lose a higher rate of efficiency,and I am sure you were aiming at 100%.Thank you again,Kindest regards,.Paul.
Thanks, Paul, for keeping us on our toes! Bark humus is one of many brown ingredients that are great for worm compost bedding when it is easily sourced locally. It is definitely an excellent option, but is not an essential. I, for one, have never used it as it is hard to come by and more expensive than the alternatives in my area. However, should you be able to get it free, or for cheap, it can stand in the place of peat moss, coco peat, or leaf mold, for example. Remember, a 60/40 blend of browns to greens is ideal. and a complex blend of browns ensures a diverse culture of microorganisms, minerals, and rate of break down.
I have a question about vermiculture. We have four house bunnies and a lot of bedding, hay, and poop mixed. I know that the poop can be put directly onto a garden, but should I add this mix to my worm beds or is it better to compost them separately?
Hi, Patty. I appreciate your question and I’m happy to add that you are in luck! Rabbit manure is an excellent source of nutrients for red wiggler composting worms. They will gladly munch the little pellets up in no time, but mass amounts of hay could end up heating up in the worm bin as it decomposes. Just be careful to keep your bedding as a well-mixed combination of materials, keep it moist, and use a handy compost thermometer to be sure you’re keeping it at safe temperature levels. https://shop.thesquirmfirm.com/worm-compost-thermometer/ Happy composting.
Another one is to use natural fertilizer, worm compost seed starting mix that is very useful to all the gardener. Thank you for sharing this article and keep sharing more.