Hey, we’ve made it to August! By now your garden has put out flowers, fruits, vegetables and already put on months of display. How is it all doing now? Are your fruiting and flowering plants going strong, or looking a little worse for the wear?
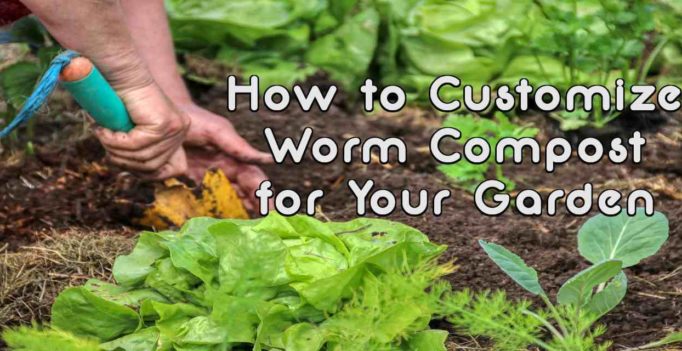
Time to fertilize again! But don’t move a muscle! You were about to head for your beautifully loose, rich worm compost, weren’t you? Hold up, wait a minute!
Is one type of fertilizer enough for a whole landscape full of unique plants? What if you could ensure, or even improve the quality of your worm compost fertilizer? You can, and I’ll show you the easiest way to do it.
You don’t need a chemistry set or to be a master gardener either! In fact, you don’t even need to worry about measuring phosphates (P), potassium (K), or nitrogen (N) to grow a truly stellar garden. Nope, all it takes is a bunch of worms, a few general guidelines, and your basic set of worm farming essentials.
Upcycle, Recycle, and Eat the Rainbow
A tree-hugging, foodie, mother of three, I’ve been known to preach messages like this on the regular. But they sound like odd instructions for improving a garden, don’t they? Stick with me, though. Great rewards come to those who follow such advice.
Now, I love nature as much as the next worm farmer, but I’ve got a confession to make. I’m kinda over the obsessive-compulsive reduce, reuse, recycle tendencies that got me worm composting in the first place.
This is just to say that I’ve moderated my practice and now don’t completely lose it if a banana peel falls in the trash instead of the worm bin. I may audibly roll my eyes and dig that peel right out, but… I’m a work in progress.
Still, no doubt about it, I harvest better compost when I give my worms a wide variety of things to eat. That means cardboard, fruit rinds, fall leaves, slimy mini-carrots, shredded junk mail, cabbage leaves, coffee grounds, even old jeans for goodness sake!
Good, Better, and Best for the Garden
Nearly anything carbon-based, or made of organic matter works for transforming into garden-ready black gold. That explains why red wigglers are easy enough to raise just about anywhere, on just about any kind of “food.”
But as the adage says, you are what you eat. Another appropriate one says you get out of it what you put into it. And in a very literal sense, that is the case with worm compost.
You can feed a whole herd of worms nothing but moist cardboard, but what will you get out? The answer is excellent, loose compost that’s full of beneficial microbes. Added to the garden, it will improve soil structure and improve things like drainage and bio-activity in the soil.
But what if you feed Eisenia fetida a more nutrient-rich diet? What if your red wigglers eat the same fruits and vegetables you do? Well, then their casts (poop) will be full of vitamins that can enrich the soil and provide nutrients too. Score!
And at that point, is it possible to take your worm compost even one step further? Yes, it is. Indeed, there is a “best” when you make and use worm compost to address specific gardening needs.
Great, let’s get after it!
Why Mess With Something That Works?
Perfectly balanced worm compost is an amazingly valuable fertilizer. Right? Imagine loose, finely textured, slightly moist granules, packed with nutrients, microorganisms. It’s the stuff of a gardeners’ dreams.
Well maintained to remain at a constant neutral pH (7), black gold is a mixture that improves the growing conditions of any plant. However, not every plant prefers the nice, neutral pH our worms require.
Indeed, most plants are happiest in slightly acidic to neutral soil (6.5-7.0) Others, like blue hydrangea like things way down at very acidic 4.0 pH. Some, on the other hand, such as asparagus, can thrive in very alkaline soils (8.0 pH).
Outside of their comfort zone, plants just won’t perform at their best. They’ll be susceptible to stress and put their energy into survival rather than output.
And that is why we want to mess with something that works- so we can help out individual plants as well as the garden as a whole.
Easily Customized Worm Compost
Last month, after building my new Coronavirus Victory Garden, I bit the bullet and rewarded myself with a great big, used, above ground pool. And I have to say, customizing worm compost for your garden is way less stressful, complicated, frustrating, and infuriating than balancing pool water chemicals.

So yeah, it’s been a month, and my water still isn’t clear. But the garden is JAMMIN’. Why? Because customized worm compost doesn’t require ANY careful measuring, hours or days of waiting, toxic, harmful chemicals, or silly test strips. It’s simple.
But not too unlike caring for a pool, creating your garden’s own perfect fertilizer does require a little bit of skill. The way I see it, doing it well requires one part compost maintenance, one part biology, and one part mixology. Let me show you how.
Step 1: Soil Test
First and foremost is my favorite step, reading garden soil using a probe meter. Every worm compost enthusiast should have one of these to regularly check their bedding. My go-to is a two-in-one accessory that gives accurate readings of both pH (acidity) and moisture at the same time- in one second flat!
You’ll want to get a reading at each plant you want to fertilize. Make sure you check your worm compost while you’re at it to see how the two compare. With pH readings in hand, you’re most of the way there.
Soil pH plays a huge role in how well roots absorb nutrients. You work hard to craft the very best fertilizer, so make sure you go all the way by addressing appropriate pH too. To do that best, we move on to step two.
Step 2: Match Each Plant to its pH Sweet Spot
This step is super fun…if you’re into nerding out on different plant species’ growing requirements. Oh, you’re not into plant research? Lucky for you, The Farmer’s Almanac has compiled all we need to know about specific plants’ pH requirements in one useful chart!
Just find the plant you are growing on the list to see what pH range it prefers.
The third and final step takes your neutral worm compost and adds pH adjusters to help create your plants’ ideal growing conditions.
Step 3: Amend Finished Worm Compost
Using nothing but a few household materials, you can make uniquely perfect worm compost fertilizer for any plant you grow.
To Raise pH Add Woodash
Lots of oldtimers grew up using woodash in the hole when it was time to plant their determinate tomatoes. With large amounts of potassium and calcium, phosphorus, and other micronutrients, it’s always been a well-known and valuable garden supplement.
Regular hardwood ash from the firepit is what we’re talking about here. Be careful not to include treated woods, or softwoods like pine. You don’t want to burn and breathe any of that chemical junk- or adding it to your edible gardens either!
To Lower pH Look to Liquids
Add in fresh coffee grounds or even cooled coffee itself. To lower pH, it is important to use unused grounds. Used coffee grounds are much closer to being neutral than not, so add those to the worm bin. Another option is to go straight for the white vinegar. Diluted with water and used to wash that worm compost into the ground, it too will help lower pH.
No matter which way you need to take your pH, this method will work. Just start by mixing amendment into your worm compost until you get a reading that matches what your lucky plant likes.
Either use that compost as a top dressing, a mix-in around the plant, or throw it into the hole when planting that plant up. If you like, you can even make it into a worm compost tea to use as liquid fertilizer. In time, you’ll find your plant responds with more lush foliage, greater fruit sets, and better resistance to environmental stressors.
What about Eggshells?
It’s well known that eggshells are an excellent addition to the worm bin or the garden. Did you know they don’t technically raise or lower the pH, but buffer it instead? The way I understand it- they are like protection, sort of keeping neutral pH bedding from falling too far into the acidic range.
If you’d like to learn more about that, check out one of our latest articles on why using eggshells is key to a successful worm farm. And there you have it. You’ve got all you need to use both raw fertilizer and household finds to accelerate production in your fall garden and beyond.
Sit Back, Relax, and Enjoy the Garden
Here’s to a job well done! Don’t fret if you don’t see results immediately. It may take some time to raise or lower the overall pH in an area well enough for a plant to respond.
Remember, rain may wash amended soil particles away or alter them with slightly acidic water. Keep high or low pH worm compost mixes on hand and in storage to be ready to bring those numbers back in line any time you need to.
For more support along your worm composting journey, subscribe to our free monthly newsletter. There you will find something new to discover, think about, and learn from about the worms who help your garden grow or reduce your waste footprint.
Until next time, happy worm composting!
Very helpful, thankyou and keep the good work up.
Hi Rahmah! It’s never too late to start a healthy hobby! I’m glad to know you’ve started something new and fun for yourself! And WOW, you got a lot of worms! You are definitely able to make a lot happen with that many. Yes, you can mix them into your normal soil. However, you should be able to test it for pH to make sure that you aren’t sending your worm herd to their death. Also, you need to be aware of their limits- temps and so forth. They’ll die below extended periods of 40 F and above 85 F or so as well. Do you know for certain what type of worm you have? Red wigglers, Eisenia fetida? Other earthworms? I suggest you brew yourself a nice cup of tea (or something) and enjoy a good read of The Squirm Firm blog posts- there you’ll find everything you need to get started with worm composting. Before you know it- your garden and worm composting hobbies will have you busy growing, harvesting, and eating!
when do you know it is time to harvest the waste
Great question. It’s time to harvest the waste when it all looks nice and “finished” or consistent throughout. We can assume about 3-5 months is enough time to finish one load, or bin, worth. At that point, there should be enough accumulated compost that you can harvest.
Can you use all of the trays at the same time?
Hi Eric!
Yes, you can! As long as you are able to properly maintain the worm bin. This means that the worms should enough food and all elements–temperature, moisture, and acidity–in the habitat are favorable for the worms.